Back at the end of November, I found a great list of all the produce that is in season in Maryland in the month of December. I couldn't help but challenge myself to cook every single vegetable on the list during the month.
I came close!
In the month of December, I cooked everything but cauliflower, kohlrabi, mushrooms, parsnips, and pumpkin. [Those will be first up for January!]
I think that's pretty good, especially because I also managed to cook several things that I found fresh from local growers that weren't on the list, such as habanero peppers, rutabaga, and mint.
Most people think there isn't much fresh and local produce this time of year, but I can now attest that is NOT TRUE.
My New Year's Resolution for 2012? Eating more fresh, local, seasonal, sustainable produce!
Saturday, December 31, 2011
Butternut Squash and Arugula Pizza
I made my own pizza! From scratch!

The recipe for the clean, whole-wheat pizza dough was from Eat Live Run. I changed it a little, substituting whole-wheat pastry flour for the all-purpose flour, and using only 1 teaspoon of salt rather than 1.5 teaspoons. It came out great! My husband suggested rolling it a bit thinner next time, but it was otherwise excellent.
For the toppings, I used mashed-up butternut squash and some garlic for the sauce, and then topped it with caramelized onions and fresh mozzarella. The onions I caramelized on the stove top by cooking them over medium heat with a bit of olive oil for almost an hour.
2 cups whole-wheat pastry flour
1 1/2 cups whole wheat flour
1 tbsp olive oil
1 1/3 cup warm water
1 packet yeast
1 tsp sea salt
In a mixing bowl, combine the warm water and yeast.

Stir in the salt, flour, and olive oil and mix by hand. Knead for 8 minutes or until dough is soft and elastic.


Take the dough out of the bowl, rub with olive oil, and then place back in the bowl.

Cover with a dish towel and let rise for one hour.

After the dough has doubled in size, cut in half to make two large pizza doughs or make mini doughs. Roll out the dough and pinch the edges to form a crust.


Cover with your toppings and bake at 425 for 10-15 minutes.
I topped mine with butternut squash and garlic as "sauce", mozzarella, carmelized onions, and cracked black pepper. Then I put it in the oven to cook.


At ten minutes, I took the pizza out and added arugula. Add more than you think you'll need; it wilts down considerably.

At fifteen minutes, the pizza was perfectly done. Crisp crust with sweet toppings!

Delicious!
Friday, December 30, 2011
Roasted Sunchokes
"Sunchokes" were on the list I found of in-season produce for December in my area.
Great! Something besides kale to eat!
But what the hell is a sunchoke?
A sunchoke, I learned by Googling, is the tuber of a sunflower, and it's also called a Jerusalem artichoke. They can be eaten raw or cooked. [And they sometimes cause gastro-intestinal upset, like beans. Beans don't bother me, so I figured I would plow ahead.]
I had never heard of a sunchoke before, but it's amazing how things you never noticed can suddenly appear in the grocery store as soon as you decide to look for them. Were they always there, always in plain sight? Has everyone else been eating sunchokes all along?
In my interview with Happy Herbivore earlier this month, I asked, in a round-about way, what on earth I should do with a sunchoke. The vegan cook book author's advice? Skip the sunchokes and stick to foods you know.
Good advice, perhaps, but I'm too curious by half.
I decided to try them, and to do the one thing that seems to make all winter root veggies delicious: roasting.
While pre-heating the oven to 400 degrees, I scrubbed my nubby, little sunchokes and then cut them into bite-sized bits.
[Having read that they could be eaten raw, I couldn't help but take a nibble. Not bad.]
I spread them out on a baking tray and coated them in olive oil.
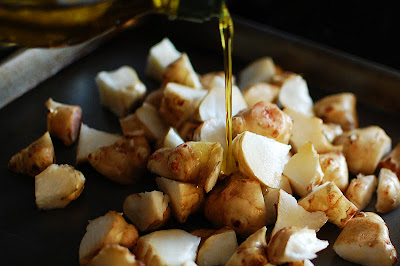
I then sprinkled cracked black pepper over them and roasted them for about 35 minutes.
The came out with a smooth, potato-like texture and a sweetness I didn't expect. They taste bizarrely like artichoke hearts, but leave a funny, almost plastic-y after taste.
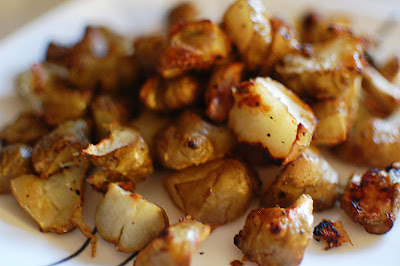
They have such a unique flavor, in fact, that I think they will take some getting used to. I think the verdict is still out on whether or not I liked them.
Either way, though, I'm glad I tried them. Variety is the spice of life...and there isn't that much variety this time of year, so I'll take what I can get!
Hand-Cut Rosemary Rutabaga Oven Fries
I found a lovely rutabega at the Anne Arundel County Farmer's Market just before Christmas.
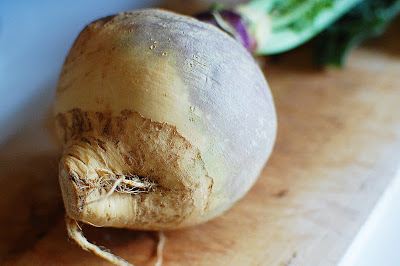
And I had no idea what to do with it.
So, I hit the Internet, and I came up with a recipe from the Gracious Pantry for Clean Eating Rosemary Rutabaga Fries.
I tweaked the recipe a little. I didn't have onion salt, so I used garlic salt instead. And I added it at the end, after the fries came out of the oven, because I always prefer to add salt at the end (you tend to use less that way).
Rutabaga
Fresh rosemary
Olive oil
Garlic salt
Cut the rutabaga into fry-shaped pieces. Spread out the rutabaga pieces and rosemary on a baking sheet, drizzle with oil to coat.

Bake at 400 degrees for about 20-30 minutes. Top with a sprinkle of garlic salt and enjoy!

Wednesday, December 28, 2011
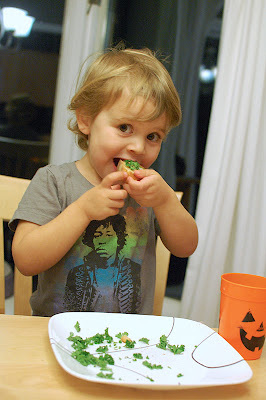
Fraggle Toast
I have a toddler, so sometimes it's all about marketing. Toast with radishes became "fraggle toast" because, as any '80's kid knows, fraggles eat radishes!
One loaf of french bread (preferably whole wheat), sliced
Enough butter to lightly coat the top of each piece of bread
Bunch of radishes, thinly sliced
Fresh parsley, to taste
Cracked black pepper, to taste
Preheat oven to 400 degrees.
Butter the slices of bread and then arrange them on a baking sheet. Bake for about 10 minutes, or until the bread is lightly toasted and the butter is melted.
Top each slice of bread with radish slices (about 3 slices per piece of toast), parsley, and black pepper.
Enjoy!

This makes for a crunchy, salty/sweet treat that has plenty of vitamins. I don't usually use butter in my cooking, but a little bit goes a long way in this recipe.
Oh, and, in case you're wondering, the marketing worked...

Habanero Bison Chili
My husband makes a mean chili.
He's been working on it, batch by batch, for years. He's been adding and subtracting ingredients, tweaking, tasting, and changing for so long, it's hard to remember the time (in college) when our "chili" consisted of a grocery-store packet of chili spice, water, and a can of kidney beans heated on the stovetop.
I think, with this recipe, he finally achieved perfection.
He doesn't measure, so I can't share the exact specifications. His recipe is so unbelievably simple it's almost crazy to think that anyone would make chili any other way. But, then again, that's kind of the whole point of this blog: remembering that the less stuff we do to whole, real food, the better it is!

1 pound of ground bison meat [Grass-fed/finished beef also works.]
4 small cans of no-sodium added, plain tomato sauce [Make sure to check that there are no natural flavors or other bizarre additives in the tomato sauce -- some brands have them, some don't. We get ours from Trader Joe's. Next year, I hope to can some tomatoes myself so I'll know exactly what's in it.]
1 can low-sodium light red kidney beans, drained and rinsed (or soaked from dry)
1 can low-sodium dark red kidney beans, drained and rinsed (or soaked from dry)
About a tablespoon of chili powder
About a 1/2 teaspoon of cayenne pepper
2 fresh habanero peppers (including seeds), quartered
Put everything in a crock pot, add a little bit of water (maybe 3/4 of a cup), and cook on low for an entire day. We usually start ours around 5:30 in the morning and eat it around 9:30 p.m., which is 16 hours later. It would probably be okay in less time than that, but I can't say for sure.
We always serve it with a sprinkle of shredded cheese. If I'm feeling crazy, I sometimes top my bowl with a scoop of plain, fat-free Greek yogurt and some diced raw onions. You really can't go wrong.
...Except if you eat the habaneros...
We treat the habanero peppers in this recipe like bay leaves. We like them to flavor the chili, but we don't really like to eat them directly. That said, they're tiny and hard to find in an entire batch of chili, so we just keep a watch out for them in our individual bowls and eat around them. It's not the end of the world if you miss one and eat it accidentally, but you might want to have that scoop of yogurt ready to cool your tongue down.
So, where's the local, in-season produce in this recipe? Well, I bought the fresh habaneros from a local farmer at the Anne Arundel County Farmer's Market just before Christmas.

They must have been grown earlier in the season, but they keep well. We signed up for the hot pepper share offered by our CSA farm, so we should have plenty of excellent peppers for making chili in the new year! Can't wait!
And, why bison? Well, bison is usually pastured and grass-fed, rather than feed-lot kept and grain-fed (like most beef sold in this country). Healthier animals make for healthier meat! I do still eat beef, as long as I know that it's been pastured and grass fed.
But there's something about "bison chili" that just sounds so...home on the range.
And it's delicious!
Monday, December 26, 2011
Warm, Winter Cream of Celery Soup
For Christmas, my uncle got me a fabulous blender that also cooks! I couldn't wait to try it out.
I started with warm, winter cream of celery soup. So many celery soups are meant to be eaten chilled; I wanted to create one that would be delicious when served warm.
1 tablespoon olive oil
1 bunch celery and leaves, chopped
1 onion, chopped
1 heaping teaspoon minced garlic
2 cups low-sodium vegetable broth
4 cups low-fat (1 percent) milk
I put the olive oil, celery, onion, and garlic in the blender first and cooked it on a high for ten minutes.
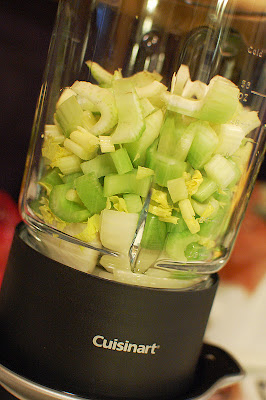
Then I added the broth and milk, stirred and lightly blended it, and allowed it to cook on high for 30 minutes.

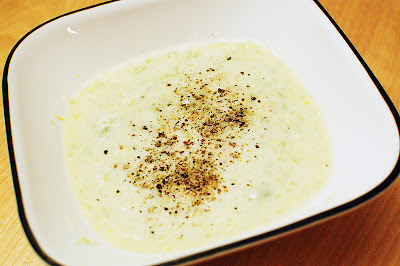
The soup came out fragrant and tasty -- delicious with some cracked black pepper -- but the celery wasn't as tender as I would have liked. As I type, I've got the rest of the batch cooking for 30 minutes more. I think it will be perfect after that!

The best part of the new blender is that there is almost no mess...I think I'm going to like it!
Carrot-Raisin Salad
This is the exceptionally sad story of my hyper-local carrots.
Last weekend, I looked out over my deck to the space where my daughters and I had a small vegetable garden in the back yard last summer. Much to my surprise, I saw carrot greens sticking up!
In case I doubted that carrots were still growing locally in December, my own neglected garden showed me that a beautiful bunch of carrots could indeed be harvested in Maryland the week before Christmas.
Look how excited I am about my carrots!!

I brought them in the house and intended to wash them later. Later turned into a few days, and the carrots were still in the fridge -- unwashed, with greens still attached -- when my husband came home from a business trip.
When he got home, he took one look at them and threw them directly in the trash.
When I found out about this, I freaked out. "Why would you throw out perfectly good carrots?!"
His response: "They were dirty."
I almost fainted. "THEY ARE DIRTY BECAUSE THEY CAME FROM THE GROUND!"
The bleach-dunked, machine-lathed, pre-bagged "baby" carrots at the grocery store have clearly made an impression on my otherwise very smart and wonderful husband.
We clearly have a long way to go on our local food journey.
This recipe for carrot-raisin salad is what I would have done with my hyper-local carrots. Instead, I did it with the other carrots in the 'fridge. At least I can take solace in knowing that they are "clean."
Carrots, shredded (as much as you want)
Raisins (until the carrots-raisin ratio looks right to you)
Plain, fat-free Greek yogurt (enough to coat carrots and raisins lightly)
Put everything in a bowl and mix it together.

Sprinkle ground nutmeg over the top.
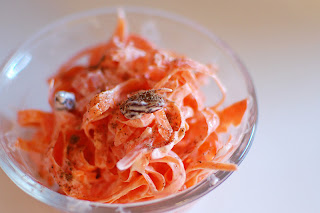
Easy and delicious. If not hyper-local.
I handed a small bowl of this salad to my toddler while she was completely engrossed in an episode of "Fraggle Rock." She broke her concentration long enough to say, "Mama, I love this snack!"
I guess it doesn't matter (that much) where our food comes from, as long as we enjoy it. Right?
Creamy Apple Pear Pie
My family used to go to a wonderful, local restaurant in New Jersey when I was a teenager. It wasn't a chain restaurant and it had amazing food. The dish I most remember was a creamy apple pie. With apples and pears as the only fruits in season this time of year, that pie has been on my mind. For Christmas Eve dinner, I decided to give a healthy version a try.

I used the same whole-wheat pie crust recipe as for Cinnamon Apple Pie.
For the filling, I used:
3 Granny Smith apples, peeled, cored, and sliced into rings
3 pears, peeled, cored, and sliced into rings
[After slicing the apples and pears, I tossed them into a bowl with some orange juice to keep them from browning. Once the apples and pears were well coated, I drained out the orange juice.]
1 cup of fat-free Greek yogurt
1/4 cup of honey
2 teaspoons of cinnamon
1 teaspoon corn starch
I stirred these ingredients together and then mixed it over the fruit.


I then arranged the apples in the pie crust.

Instead of covering the whole pie with another layer of crust, I used cookie cutters to cut Christmas-tree shaped pieces of pie crust out and then laid them over top in an overlapping row. Leaving some of the apples and pears exposed allowed them to crisp and caramelize a bit in the oven. I baked the pie for 45 minutes at 350 degrees. This allowed all the apples and pears to maintain some "bite." It could be baked for another 15 minutes or so if you prefer softer apples and pears in your pie.

The result was quite close to what I remember from that fabulous restaurant in New Jersey, but without what I'm sure was A LOT of heavy cream. With a whole-wheat crust, fresh fruit, and fat-free yogurt, this pie is healthy enough to eat for breakfast!
Sunday, December 18, 2011
Red Velvet Hot Cocoa
I roasted three beets and pureed them for my red velvet cupcakes with cream cheese frosting. I intended to use the leftovers as baby food for my infant.
And I will. But I had to steal just a teaspoon of beet puree to try another fun idea:
Red velvet hot cocoa!
If you can do it with cake, why not with hot cocoa?
8 ounces of hot milk (I nuke mine for 2:30)
2 heaping teaspoons unsweetened cocoa
1 teaspoon of maple syrup
1 teaspoon beet puree
Put the cocoa in a mug and stir the hot milk in (don't delay, or clumps will form!). Once you have your hot cocoa, add the teaspoon of maple syrup and the teaspoon of beet puree.
It comes out rich and a little bitter, almost as if it were made with dark chocolate. Delicious! And, unlike my cupcakes, the hot cocoa maintained the gorgeous, red beet color!

Red Velvet Cupcakes with Cream Cheese Frosting
Several years ago at Christmas, I decided to try to make a red velvet cake. It was a full-on, oil, butter, egg, and sugar concoction, and it came out pretty well. But I was dismayed to learn that what gave the cake its signature look was two bottles of red food coloring. I assumed there was some greater trick.
It turns out, there is. Or, rather, there can be.
Fresh beets!

But, it's tough. You have to get the Ph of the cake to be just right in order for the beets to maintain their red coloring through baking. And mine did not. The result, though brown, was a rich and delicious cupcake that wasn't at all too sweet. Even if it also wasn't all too red.
There's always next time.
I based my recipe on one from Bake Cakery. I, of course, subbed out the oil, whole eggs, white flour, and sugar.
¾ cup pureed beets (I roasted them at 350 degrees for 1 hour, with about 1 inch of water in the bottom of the pan, covered with aluminum foil).
¼ cup orange juice
1 tsp. plain, fat-free, Greek yogurt
½ tsp. balsamic vinegar
4 egg whites
¾ cup whole-wheat pastry flour
⅔ c. honey
½ c. unsweetened cocoa
1 tsp. baking powder
½ tsp. baking soda
¼ tsp. salt
Preheat the oven to 350 degrees.
Whisk together all of the dry ingredients and set aside.
Blend the wet ingredients until uniform.


Add the dry ingredients to the wet mixture and stir until combined.


Bake for 20 minutes or until a toothpick in the center of the center comes out clean.
Cool before icing.
I frosted them with a honey cream-cheese frosting recipe I found at Redbook. This frosting couldn't be simpler.
2 packages of organic Neufchatel cheese [I don't use "cream cheese" because it has a surprising amount of crap in it -- preservatives, gums, artificial flavors, etc. The organic Neufchatel cheese I found was not perfectly clean either, but it was much, much better than the cream cheese.]
1/3 cup of honey
2 tablespoons vanilla extract
Beat the Neufchatel cheese, honey, and vanilla extract until light and fluffy. Chill until stiff enough to spread.


I iced the cupcakes with the cream cheese frosting and served with a drizzle of honey on top. The flavor is complex and pleasing for an adult (not too sweet, and almost bitter / salty...in a good way), but not too refined for my toddler!


Two-Potato and Leek Soup
I generally like potato and leek soup, but it can be a little...boring.
So, I decided to spice it up a little.
The first thing I did was take on its pallid coloring by throwing a sweet potato into the mix.
Then, I added a bit of cayenne for some kick.
I was working off of a (much fancier) recipe from David Lebovitz, who inspired the use of a leaf from a Brussels sprout as a garnish.

This turned out to be an easy, fun, little vegan soup that even my carnivorous husband enjoyed.
1 tablespoon olive oil
4 leeks, washed and sliced
1 teaspoon dried thyme
1/4 teaspoon cayenne pepper
4 cups low-sodium vegetable broth
2 cups water
3 potatoes, cubed
1 sweet potato, cubed
Black pepper, to taste
Saute the leeks in olive oil until soft in a large soup pot.

Chop potatoes. I didn't bother to peel them because I like the skins. I did wash and scrub them very well, though.


Add thyme and cayenne to leeks and stir.
Add broth, water, potatoes, and sweet potatoes.

Allow to cook for 20 minutes, or until potatoes are soft.
Bend with an immersion blender.
Ladle into bowls, top with black pepper to taste, and garnish with a Brussels sprout leaf.
[P.S. -- If your picky husband -- who doesn't eat sweet potatoes -- peeks into the pot and assumes that the orange things he sees are carrots, do not disavow him of this notion.]
So, I decided to spice it up a little.
The first thing I did was take on its pallid coloring by throwing a sweet potato into the mix.
Then, I added a bit of cayenne for some kick.
I was working off of a (much fancier) recipe from David Lebovitz, who inspired the use of a leaf from a Brussels sprout as a garnish.

1 tablespoon olive oil
4 leeks, washed and sliced
1 teaspoon dried thyme
1/4 teaspoon cayenne pepper
4 cups low-sodium vegetable broth
2 cups water
3 potatoes, cubed
1 sweet potato, cubed
Black pepper, to taste
Saute the leeks in olive oil until soft in a large soup pot.

Chop potatoes. I didn't bother to peel them because I like the skins. I did wash and scrub them very well, though.


Add thyme and cayenne to leeks and stir.
Add broth, water, potatoes, and sweet potatoes.

Allow to cook for 20 minutes, or until potatoes are soft.
Bend with an immersion blender.
Ladle into bowls, top with black pepper to taste, and garnish with a Brussels sprout leaf.
[P.S. -- If your picky husband -- who doesn't eat sweet potatoes -- peeks into the pot and assumes that the orange things he sees are carrots, do not disavow him of this notion.]
Subscribe to:
Posts (Atom)